Showing posts with label raw foodist. Show all posts

Thursday, August 7, 2014

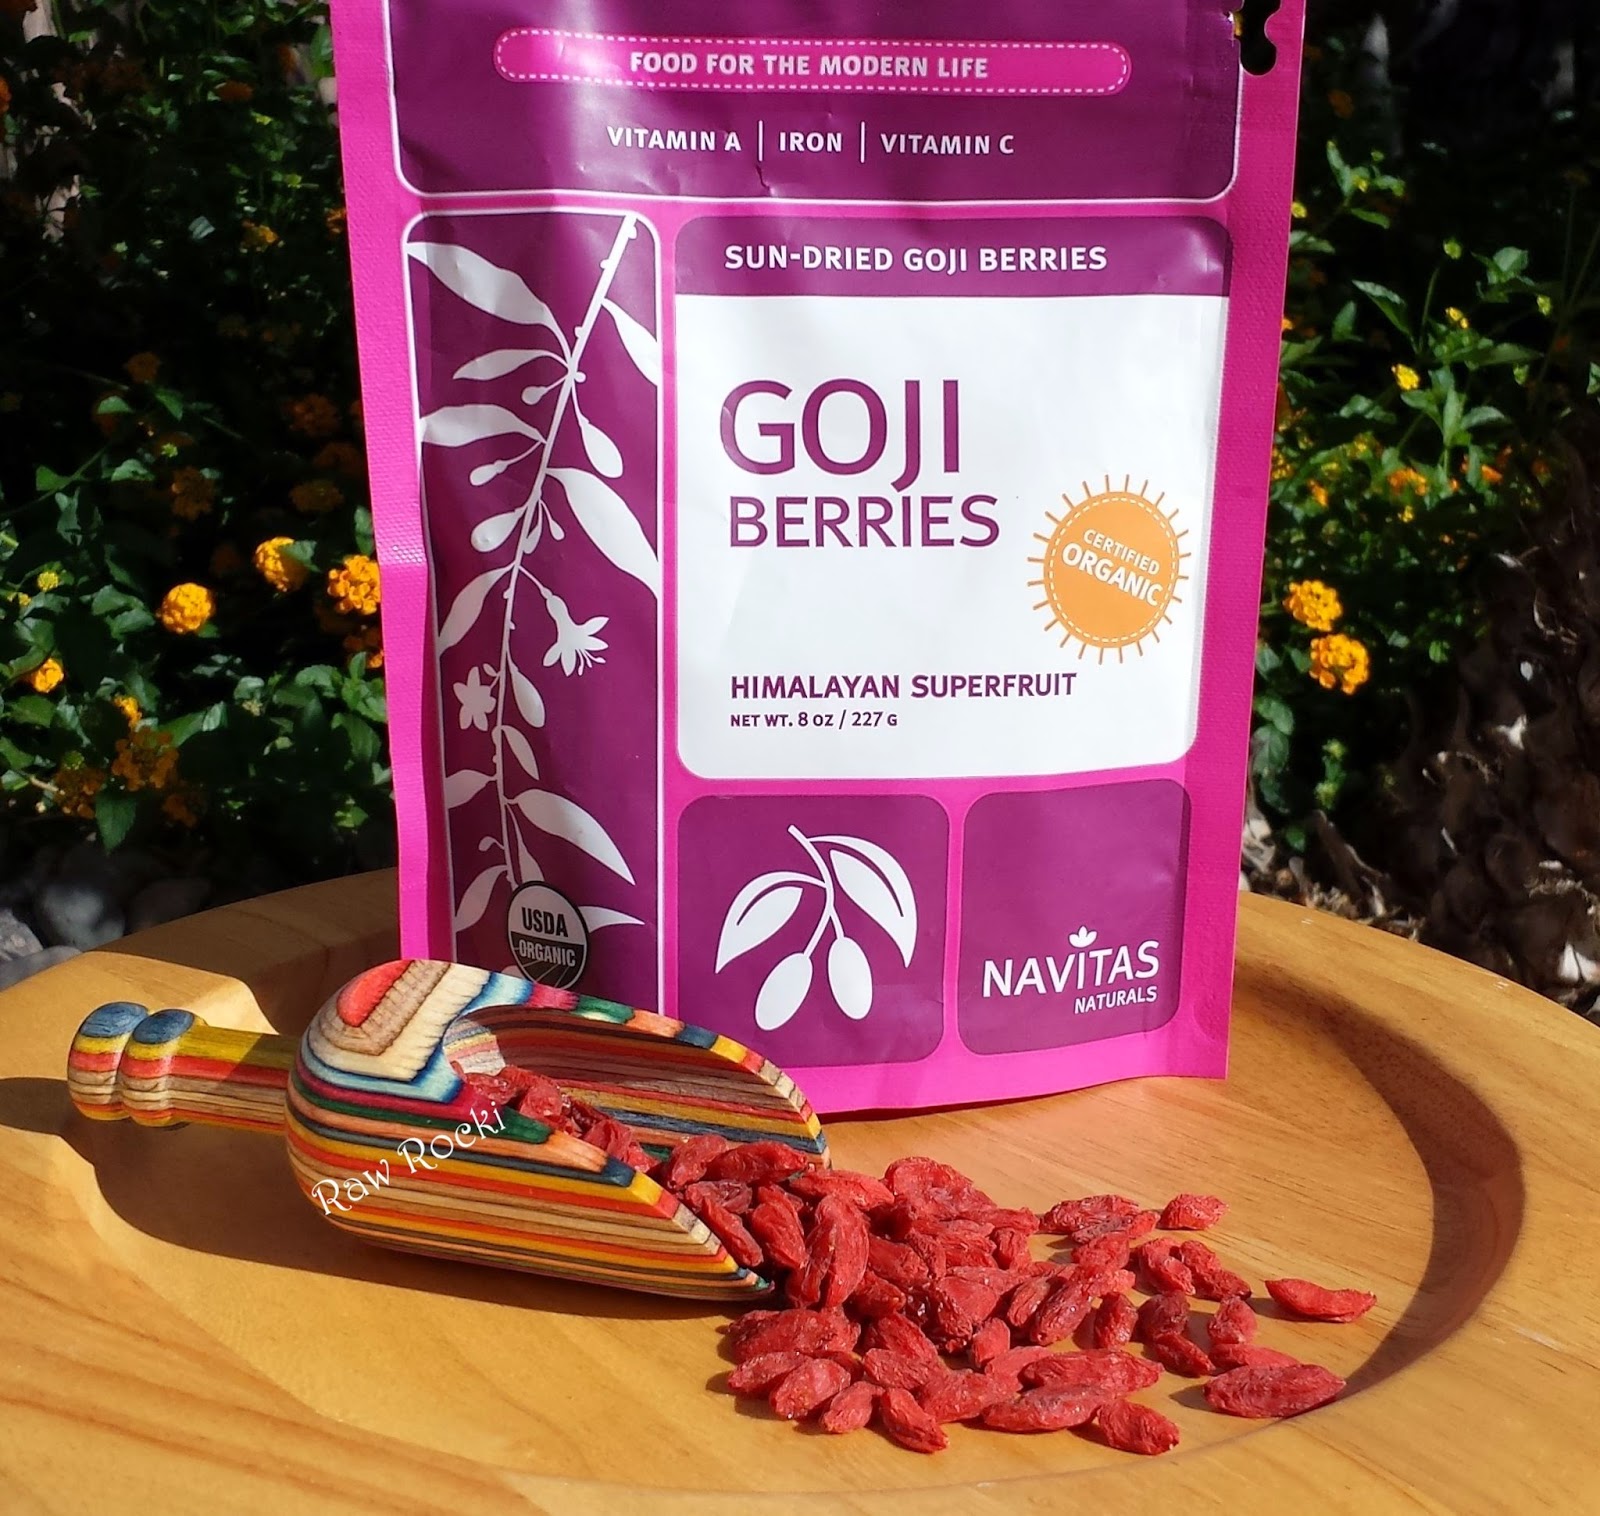
Goji Berries - Superfood

Goji Berries

I absolutely love goji berries!  This little powerhouse of a berry not only adds a nutritional punch to your diet, but can be used in a variety of recipes, or eaten as is.

Dried goji berries are chewy with a taste all on their own.  They are not overly sweet and have actually been described as a cross between a cherry, raisin and cranberry.  These tiny berries are a powerful nutrient rich food and have been used in Traditional Chinese Medicine for over 2000 years.  Filled with antioxidants, carotenoids, 18 amino acids, fiber, vitamins A, C and E, and over 20 other trace minerals and vitamins including zinc and iron... well, you can see why they are one of the top superfoods.

I add goji berries to a variety of my raw vegan recipes for added nutrition, flavor and bulk, such as: smoothies (makes an excellent chocolate smoothie combined with raw cacao powder, another nutritious superfood), nice cream (vegan ice cream), brownies, bliss balls, protein bars, overnight oats, chia pudding, and so much more.

There's much more to know about Goji Berries, so Google them for more information.

Be healthy.

Peace☮
Rocki

Saturday, May 31, 2014

A&J Smoothie - Almond Butter and Jam

Smoothie - Almond Butter and Jam

The other day I was dreaming of peanut butter and jelly sandwiches.  So I created this thick and delicious healthy smoothie!  But instead of a P&J, this one is A&J -  without the bread.  Creamy almond butter and lick my lips blueberry grape jam.

I don't use too many nuts in my smoothies, but a little here and there is perfect for me.  Besides, it's kind of hard to create a A&J smoothie without them. 

A&J Smoothie - Almond Butter and Jam
 
Jam Swirls
1 cup blueberries
1 cup red grapes
1 very small banana

Blend, pour into separate container and put in freezer while making next layer.

Almond Butter Layer
1 frozen banana
1 non-frozen banana
1 heaping TBS almond butter
1/2 cup water or milk of choice (adjust as needed)

Blend in powerful blender.  Alternate each layer in a tall glass as you wish and enjoy!

Peace☮
Rocki

Friday, April 25, 2014

Raw Vegan Single Serve Nut Fudge Brownie

Raw Vegan Fudge Brownie - Single Serve


Single serve nut fudge brownie. Because sometimes you need to satisfy that "GOTTA HAVE CHOCOLATE NOW!" fix in a jiffy.

While this raw vegan brownie does contain nuts, it's still healthy and guilt-free - and quick to make in a single bowl.

Single Serve Nut Fudge Brownie

1/3 cup walnuts
1/2 Tbs dried coconut shreds (or hemp heart seeds)
1/2 Tbs cacao powder
1/2 Tbs agave (or liquid sweetener of choice)
1/2 Tbs almond butter or other nut butter

Grind the walnuts in a coffee grinder or for a quick, barbaric dishes-free way: put them in an unsealed baggie and smash them with a heavy utensil, but don't pulverize them to smithereens.  With a fork, combine all ingredients in a small bowl. Form into a brownie or any shape you wish. Eat this warm ooey gooey fudgy nutty brownie immediately or put in fridge for at least 30-60 minutes and it will taste even better! 

That's it.  Simple and quick. Your chocolate fix is now cured. 

Peace☮
Rocki

Thursday, April 24, 2014

Becoming Raw Book and Rocki's Tropical Peachy Green Smoothie

Becoming Raw Book and Rocki's Tropical Peachy Green Smoothie

If you're new to raw or thinking about becoming a raw vegan, I highly recommend this book: Becoming Raw.  This is one of the first of several books I bought when Mark and I started on our raw path almost 2 years ago.  I keep this informative guide book in my kitchen and still reference it - and learn something new each time.

While this is not a recipe book, it does have a few in there.  But in short, it is a complete book filled with science-based raw vegan nutrition from A to Z - and much more. This easy to read book is packed full with a wealth of information and truly is an "essential guide to raw vegan diets".

I'm including my smoothie recipe in this post since I do have it pictured.  That would be rude of me if I didn't ;)

Tropical Peachy Green Smoothie

2 handfuls baby spinach
1 peach (or 1 cup frozen)
1 large frozen banana
1 Tbs dried coconut shreds
1 piece peeled turmeric (approx. 1")
1 Tbs flax meal
1 Tbs maca powder
3/4 cup coconut water (adjust as needed)

Blend in a powerful blender and enjoy.

Peace☮
Rocki

Wednesday, April 23, 2014

Raw Carrot Cake Cookies - Vegan and Nut-Free

Raw Carrot Cake Cookies - Vegan and Nut-Free

Carrots.  I love carrots!  I eat them whole, shredded, grated, julienned, chopped, diced... guess I could just sum it up and say I eat them raw.

Not only are carrots delicious in the raw or as a savory side dish (not to mention packed with nutrition), they also make a very yummy dessert - like cookies!  And smoothies, shakes, cakes, pies... I'll stop.

I wanted a cookie without nuts.  I'm not a nut hater and I do love them, but I like to keep a low fat diet so I don't use them that much.  When you bite into these cookies, it's like taking a bite of moist carrot cake. Mark REALLY loves them.  I have to hide them in the back of the fridge or put them in a hidden container.  Kidding.  Maybe.

Raw Carrot Cake Cookies - Vegan and Nut-Free
makes approximately 20-24 small cookies

1 full cup carrots - roughly chopped
1 cup hemp heart seeds
1/4 cup coconut shreds
2 Tbs raw vegan protein powder (or replace with flax meal or more hemp)
1 cup packed medjool dates
1/2 tsp cinnamon
1/4 tsp nutmeg
1/8 tsp cloves

In food processor, process carrots into tiny little bits.  Do not over process - you don't want mush, just tiny bits.  Put into large bowl and add in the remaining ingredients.  Stir well to combine.  Mixture will seem too wet, but after dehydrated they will be deliciously moist cookies.

Form into small balls and flatten into cookie shape.  You may need to periodically wet and dry your hands as they'll get a bit sticky. Put onto lined dehydrator tray and dehydrate at 145° F for 1 hour only then turn down to 115° F.  Once tried to touch on top, remove and flip them from the lined tray onto a mesh tray and continue dehydrating until done.  Total time varies approximately 10-12 hours or until desired liking. These took me 10 hours total time. 

Store in fridge or freezer in a sealed container.

NOTE:  these are too wet for bliss balls or non-dehydrated cookies.  However, if you do not have a dehydrator you can use shredded carrots or squeeze dry the processed carrots with paper towels and add in a about 1/4 cup flax meal until the mixture holds together.

Peace☮
Rocki

Saturday, April 19, 2014

Raw Vegan "Baked" Bean Sauce - great on veggies too!

Raw Vegan "Baked" Bean Sauce

As you may know by now, I enjoy turning traditional foods raw and vegan.  However, there are some foods that I cannot eat or do not like.  Let me back up to give you a little perspective, I have several food allergies and I'm practically and joyfully fully raw, say at least 95%, while Mark is at least 85% raw.  There are several foods that he likes that I've recreated for him to fit into our raw lifestyle and this is one of them - Baked Beans.

While the beans themselves are not raw, the sauce I created is and I must say is pretty darn tasty!  Too bad I didn't get to partake on the entire dish - beans do not like me one little bit.  I can, however, handle adzuki beans that I sprout myself. 

Anyway, Mark was hankering for some baked beans so to the store I went.  I read the ingredients on several cans and decided that this was doable.  Because I do not cook food, I bought a can (bpa free) of Eden Organic white beans and home I went.  I donned my Raw Vegan Mad Scientist Coat (apron) and into the garden I went (kitchen).  After adding this and that, adjusting here and there, I exclaimed "I MADE RAW VEGAN BAKED BEANS!" - with a bit of weird science laughter.  

Into the office I went with my bowl and spoonful of sauce.  I gave Mark a taste.  His eyes glazed over with delight - or maybe I had forgotten to wipe the sauce off my chin.  Anyway, I had to stop him from taking the bowl out of my hand. In other words, I had another success!

Here is my recipe for the sauce that can be added to your own cooked beans or canned. 

RAW VEGAN "BAKED" BEAN SAUCE

1 15 oz bpa free can of white beans - drained and rinsed - or use beans of choice.  This sauce was rather delicious on my raw veggies, so the choice is yours.

1/4 cup sundried tomatoes - soaked in 1 1/2 cups fresh water and drained - reserve soak water
1 cup of the soaked water
4 medjool dates
1/2 tsp onion powder
1/2 Tbs raw gluten-free apple cider vinegar
1/4 tsp sweet paprika
1/8 tsp turmeric - ground/powder
1 tsp mustard
pinch of sea salt

Put all ingredients into blender and blend until creamy.  Due to date fruit size varies, along with blender types, you may need to add more of the soak water and/or adjust to desired liking.

Pour sauce onto beans and gently stir to combine.  Enjoy immediately or chill for a couple hours.  Store in fridge up to 3-4 days.

Peace☮
Rocki

Friday, April 18, 2014

Raw Vegan Lasagna

Fresh Raw Vegan Lasagna
This is another recipe that I transferred from my old blog

Before I go on about my Raw Vegan Lasagna recipe, I just want to mention that I have included several pictures to show part of the process and how the ingredients look after preparing them.  I just don't want you to feel overwhelmed by all the photos.

Every time I make my lasagna I change it up here and there.  I never measured anything or wrote it down, for most of my recipes actually.  However, after several requests and starting my old blog, plus preparing for my E-books, I figured it would be a good idea.  I have a kitchen full of my recipes. 

I'll skip the part in telling you how flavorful, delicious, mouthwatering and nutritious it is and get straight to the good stuff.  One little note and then I'll zip it.  Under each photo I explain a little about it, but the entire recipe is at the end.

Veggies prepped and ready to make lasagna

This is a little backwards, but this is almost the end result after preparing all the fresh ingredients (except for the zucchinis) in order to make the lasagna.
 
Wilted fresh baby spinach

Sometimes I like to wilt the fresh baby spinach a little in a tasty mixture, but not to the point that it looks entirely cooked.  It will take on a more cooked texture and appearance after the lasagna has chilled for a couple hours.  I start with the spinach to give it time to wilt and set it aside.

Fresh mushrooms take on a "cooked" texture after marinated

Next we wilt the mushrooms.  I slice the fresh mushrooms and place them in a bowl with my wilting mixture.  I like to wilt them to not only take on a cooked appearance, but for taste and texture as well.  I set this aside and proceed with the next step.  (I strain them after they get to the wilting point that I like)

raw vegan "cheese" crumbles

Sometimes I have this "cheese" on hand as it is a great topping for salads, but to show the entire process of this recipe I made some fresh.

fresh tomato sauce

The yummy sauce!  I start with sundried tomatoes that I soak in warm water.  I actually start the recipe by soaking them and proceed from there, but I didn't take a picture of that part. 

Anyway, after making the sauce I put it in a fine mesh strainer while I prepare the rest of the ingredients.  The reason I do this is because I don't want my lasagna to be wet and soppy.

Sliced zucchini using a mandolin

I slice the zucchinis very thin, approximately 1/8", except for about 5 slices as I make them a little thicker and use for the bottom layer.  If you don't have a mandolin, a sharp knife is perfectly fine.

Zucchini pasta noodles

It still amazes me how zucchini can take on a pasta texture in many raw recipes and it is so yummy!
 
organic olives

Occasionally I add clean organic olives in my lasagna, but this time I used them as a garnish.

first layer of lasagna

Now to layer the lasagna.  No, I didn't forget my lasagna dish.  Sometimes I like to make it on this platter as it is easier to cut and serve from.  The choice is yours.

I start with a little sauce on the bottom, then zucchini and more sauce.  You can layer how you wish, but I'll explain how I do it in the recipe at the end.

raw vegan lasagna RAWks!

(waves magic wand) And in a blink of an eye we have raw vegan lasagna! 

veggie filled lasagna

Look at all those yummy layers!  This can be served immediately or put it in the fridge to chill so it can take on a more cooked texture and appearance as in the photo below.


chilled raw vegan lasagna takes on cooked texture

This is what it looks like after chilled for a few hours.  Sometimes I pop it in the dehydrator to warm up a bit, but for the most part we love it right out of the fridge.

And now for my recipe.  Don't let all the steps scare you...once you get everything set out and start going it is a fairly smooth process.  Just allow yourself a little time, it is SO worth it!  I listed everything in order as I make it.  This can be altered in many ways to fit your liking and/or diet.  For instance, you can completely skip the wilting process and use the fresh ingredients as is.  I make plenty lasagna that way too as it's quick and simple .  Hope you enjoy it!

Raw Vegan Lasagna

Step 1 - Soaking Sundried Tomatoes
3/4 cup sundried tomatoes

Soak in warm water and set aside while preparing the other ingredients.  You will use these in the sauce that will be made in Step 6.

Step 2 - Wilting Mixture
1 Tbs EVO (extra virgin olive oil)
1 1/2 Tbs Braggs or other Amino Acids
1 Tbs Balsamic Vinegar
1 Tbs Agave

Wisk all ingredients in a small dish. I use a glass measuring cup as it is easier to pour from.  This is used for both the spinach and mushrooms.  It may not seem like enough for both, but it is - plus the shrooms will produce liquid as they start to wilt.

Step 3 - Wilt Spinach
3 big handfuls of fresh baby spinach

Loosely tear spinach and place in large bowl.  Add less than half of the wilting mixture to the spinach then toss to coat.  Set aside.

Step 4 - Wilt Mushrooms
8 oz or more of Mushrooms of choice

Slice mushrooms and place in bowl.  Add remaining wilting mixture, toss to coat well then set aside.

Once they have wilted to desired liking, drain and set aside.

Step 5 - "Cheese" Crumbles
1/2 cup cashews
3 Tbs pine nuts
1 small garlic clove
1 Tbs nutritional yeast (gives it the cheesy flavor, not to mention health benefits)
1/8 tsp sea salt

Add all ingredients to food processor and process until it resembles small crumbles.  Set aside.

Step 6 - Sauce
1 1/2 cup cherry tomatoes (or tomatoes of choice)
3/4 cup soaked and drained sundried tomatoes from Step 1
1 medjool date (stone removed)
1/3 cup roughly chopped onion
1/2 Tbs Balsamic Vinegar
4-5 fresh basil leaves
1 large garlic clove
1 Tbs Italian Seasoning

Place all ingredients in order into food processor and pulse several times until well blended (may need to scrape down sides), but do not over process.  You don't want this to be a smooth sauce or it will be too runny for the lasagna - it needs to be a little chunky.  Set aside.

Step 7 - Zucchini Noodles
2 large zucchinis

I use a mandolin, but if you do not have one then a sharp knife will be fine.  I start by making about 5 thick slices which will be used for the bottom layer.  Slice the remaining zucchinis very thin or desired liking.  Set aside.

Step 8 - Layer the lasagna  
Now comes the fun part...wait, the above was fun too, right?  This part isn't rocket science, but I'll explain how I layered it, but feel free to layer as you wish.

Take a little bit of sauce and splatter it around with your hand onto a large platter, just to have a thin layer.  Just note here that for the rest of the layering when it comes time for the sauce, I use my clean hands because it's much easier to place on top of the zucchini and spread around.  The sauce doesn't completely cover everything like in traditional lasagna, but enough to get a decent covering.  So the rest goes like this...

Place the thick slices of zucchini on the sauce plate and then...
sauce
"cheese"
spinach
zucchini
sauce
"cheese"
mushrooms
zucchini
sauce
optional olive garnish
top with lots more "cheese"

You can serve and enjoy immediately or place in the fridge to chill a few hours which will let the zucchini become more "noodle" like and all ingredients take on a more "cooked" texture and appearance.  You can also warm it in the dehydrator if you so choose.  Enjoy!

Peace☮
Rocki

Friday, April 11, 2014

Raw Vegan Onion Rings

Raw Vegan Onion Rings

Ahhhhh... the smell of onion rings.  Due to food allergies, I haven't had onion rings or the likes in over 14 years.  I can honestly say that one of the traditional snack foods I miss is onion rings.  Now hear me out.  I don't mean the greasy, high calorie junk food onion rings themselves.  Well that's what they were, but I miss the taste.  Yes I know that doesn't make sense... welcome to my world ;)

I am beyond happy with my raw vegan lifestyle and would never change it - I thrive for raw food, but I'm human and sometimes have cravings.  When that happens, I turn traditional food raw and healthy. 

Back to front: coconut flour, coconut milk and flax meal & coconut shreds blend

I wanted to keep this batch nut-free.  I'm not allergic to nuts and do use them as they provide nutritional value, but I don't use them daily as I like to keep our meals low fat.  I also wanted a different flavor than traditional onion rings.  Coconuts were my inspiration - along with lack of sleep.  For some reason my mind likes to create at the most odd times.  I didn't object this time :)

My house smells like I can eat it!

I had no idea how long it would take for them to dehydrate.  I live in the southwest and yes it's dry with very little humidity here, but we do experience changes in weather from frost to our fair share of humidity, along with heat.  Yesterday was 98 degrees and we were heading for a record spring day high, so it probably wasn't the best day to test these out.  Well, to sum this part up it only took 7 hours, but there are many variables to this which will be in the recipe below.

Guilt-free onion rings

I was pleasantly surprised how this batch came out!  They had the crunch factor I wanted and the tropical like coconut flavor was perfect.  I'm going to make a couple of adjustments, like make them thicker (I love thick chunky onion rings!) and am already working up another onion ring recipe with a different overall flavor.

Oh and don't expect traditional fried onion rings, this is a healthy raw version which scored me two thumbs up from my official taste tester.  Mark mumbled: "MMMMMMM" along with something else but I couldn't quite make it out while he was taking bite after bite after...

One final note then onto the recipes.  I wanted a dipping sauce that would compliment the coconut onion rings.  So I basically threw something together and will include that below.

Raw Vegan Onion Rings

2 large sweet onions (or onions of choice) sliced and rings separated
I used the 3/8" on my mandolin, but would have preferred a thicker ring.  Just note that the thicker the slices the longer in the dehydrator

Bowl #1
1 cup coconut flour

Bowl #2
1 cup coconut milk (if you use canned, thin it out to milk consistency or use almond milk)

Bowl #3 (dry)
1 cup flax meal
1 cup dried coconut shreds (I used unsweetened)
1/2 tsp sea salt
1/2 tsp ginger
1 tsp sweet paprika
1/8 tsp cayenne pepper

This is the messy part and will take a little while, but it's super easy so put on some good music and have fun. 

In bowl # order dredge/coat each onion ring into the mixture and put onto dehydrator sheet.  I used the back of a large spoon handle, with made it easier and less messy.  Here's the breakdown:

- Coconut flour (#1) this is a dusting only to prepare the ring for the next bowl, so do not worry if it looks like nothing is sticking - it will simply look like dust
- Coconut milk (#2) dip the dusted ring into the milk to coat
- Dry mix (#3) place the ring into the dry mixture and coat well.  Before placing on dehydrator sheet, give the ring a little shake into the dry bowl to let any loose ingredients fall off.

Note: due to veggie size varies, you may need to add more to the bowls if you run low.

Dehydrate at 115° F approximately 7-12 hours or until desired doneness.  Please note that time varies due to numerous factors, such as type of dehydrator, humidity, weather, thickness of onion rings, etc., so please take this into account.  As mentioned earlier, I live in the desert and it was a hot day yesterday so this batch took around 7 hours (I have a 5 tray Excalliber). 

Storage: we ate most of these with our salad last night and there was about a couple handfuls left so I stored them in a zip bag in the fridge.  This morning I tested them (I had to, it's my job) and they were still crunchy with a moister onion - total yum factor!


Sweet n Spicy Dip/Sauce/Dressing

1 yellow bell pepper
1/4 cup hemp heart seeds
1 small Serrano pepper (seeded)
1 Tbs agave
1 Tbs raw gluten-free apple cider vinegar

Blend until smooth and creamy.  This was super yummy with the onion rings, as well as on our salads.

Hope you enjoy these recipes.  Once I create the other onion ring batch I'll post it.

Peace☮
Rocki

Thursday, April 10, 2014

Flax Seeds and Meal

Flax Seeds and Flax Meal

These itty bitty seeds are a nutritious plant source of fiber (soluble and insoluble), omega 3 essential fatty acid, antioxidants and lignans.  They are a kitchen staple for raw foodist's as well as in many traditional kitchens. 

I use flax in a variety of my raw recipes in place of nuts and oat flour or in addition to, as I like to keep a low fat diet, but mainly for the nutrients.  I use it in our daily smoothies, crackers, bread, tortillas, pizza crust, cookies, brownies... the list is endless.  Flax is a perfect food to add to many recipes, not just for the nutritional value, but because they act as a binder as well - an excellent replacement for oil and eggs.  When soaked, they become gelatin and gummy/sticky like which helps hold ingredients together and adds a bit of bulkiness.  

Some recipes call for both flax meal and seeds, or one or the other.  It depends on what you're making really.  For instance, flax seeds makes an excellent cracker, but I also add flax meal to mine.  You can eat the flax seeds on their own, but it is said that you may not be receiving the entire nutritional benefits as the seeds may pass through your intestines undigested.  In any case, you can't go wrong by adding at least 1 Tbs a day of flax meal or flax oil to your healthy diet - for starters.

Flax seeds are best stored in a dark sealed container or at least in a dark area such as your pantry, and store flax meal in the fridge or freezer to keep it from loosing its nutritional value.  I buy flax seeds in bulk and grind my own with a coffee grinder as needed and enough for about a weeks worth of smoothies, etc.

Peace☮
Rocki

Wednesday, April 9, 2014

Raw Vegan Pizza - Nut and Gluten-Free Crust

Raw Vegan Pizza
This is one of my recipes from my old blog that I've transferred here.
 
One thing I love to make is my raw vegan pizza... nom nom nom!  That's right... raw vegan pizza.  Follow me and I'll tell you about it.

Nut-Free Pizza Crust

Above is my own tasty recipe for the crust, which is not only raw and vegan, but also gluten and nut free.

Pizza with lots of veggies!

I like to change up my pizza each time I make it, from a variety of toppings, sauce or no sauce and cheese.  Yes, that's right... raw vegan cheese.  Stay with me now and I'll give you the recipe soon.


Mandala Pizza

I know my pictures are not the best, but heck, I just love how this one looks so have to share another view of it.

Back into the dehydrator

After I put all the ingredients onto the crust I then popped it back into the dehydrator for about an hour.  This gives the cheese time to settle in with the ingredients and makes the house smell yummy!

Fresh sliced pizza anyone?

If you think us raw vegans only eat bunny food, take a look at this scrumptious pizza.  Well, we do still love our bunny food :)

This slice is all mine!

And now it's time to eat!  As you can see, the crust holds up nicely and is quite filling.  We had a small side salad with a couple little slices and... okay, well not so little... and we were full.

That's the end of my pizza tour and now it's time for the recipes for my crust and cheese.

Raw Rocki's Pizza Crust

1/2 cup flax meal
1/2 cup flax seeds
1/2 cup hemp seeds
1/2 cup sunflower seeds (ground into little bits like flour)
1/4 cup nutritional yeast
1 1/2 TBS psyllium husk
1 TBS Italian seasoning
1/4 tsp sea salt

Combine all the above ingredients in a large bowl and set aside.

1/3 cup sundried tomatoes - soaked in 1 1/2 cups warm water for about 30 minutes (drain and reserve liquid as you'll need it in the next step)
1 large tomato
1/2 red bell pepper
1 tsp garlic powder or clove
1 tsp fennel seeds
pinch sea salt

Put ingredients into a food processor and process well.  The mixture will be somewhat thick and not watery.

Add 3/4 cup of the soaked water to the dry mixture bowl and combine well.  Now add the above tomato mixture to the bowl and stir until combined.  If mixture seems too thick, add more water a little at a time.  It won't be like typical pizza dough, but will be thick and pliable enough to form with your hands.

Line a dehydrator mesh tray with a teflex sheet (or similar) and spoon the mixture onto it.  I put another teflex sheet on top of the mixture then use a rolling pin and then my hands to form into a big round pizza crust shape.  You can also make a big square pizza too, I do that sometimes.  Don't make it too thin as it will shrink up while dehydrating.

Put into the dehydrator at 145° F for 1 hour only then turn down to 115° F.  When the top crust is dry to touch (about 2 hours in), transfer it to another mesh tray and remove it from the teflex sheet by slowly peeling it off.  Put it back in for about 1/2 hour or so and then flip back over until done.  Total time can vary between 4-6 hours or longer due to a variety of factors (thickness and size of crust, weather, location, etc.).  Mine took about 4 1/2 hours this time, but I live in a dry state so that is a factor.

When the crust is done, top with your favorite ingredients and either put it back into the dehydrator for about an hour or eat right away and enjoy!

**************************

Before I get to the cheese recipe, just want to mention that yes, all the ingredients are raw even the mushrooms.  We like the mushrooms to take on a little bit of "cooked" texture so I wilt them slightly by using a tiny bit of liquid amino acid like Braggs.


Raw Rocki's Pizza Cheese

1 cup cashews - soaked for at least 2 hours then rinse and drain
1/4 cup pine nuts
1 yellow bell pepper
1 clove garlic
3 TBS heaping of nutritional yeast
1/2 tsp sea salt
1 TBS raw apple cider vinegar (I use Braggs Organic)
 1/4 cup water (can adjust texture by decreasing or increasing water for a thicker or thinner cheese)

Combine all ingredients into vitamix/blender and blend until smooth and creamy.  This makes much more than what you need for the pizza crust, but I always make this size batch because Mark likes to use it as a snack dip for his veggies, etc.

Hope you enjoy these recipes and feel free to change them up as you need to.

Peace☮
Rocki

Edited on 6/26/14

Friday, March 28, 2014

Raw Raspberry Lemon Cheesecake

Raw Vegan Cheesecake - Raspberry Lemon
 
I don't make these types of desserts too often, but when I do, I have so much fun creating!  I thought of a few more ways to garnish my raw vegan cheesecake while Mark and I were enjoying bite after bite, but looks like I'll have to do that next time.

 
Red, White and Blue - and lemon too!

Just a pretty view from the top, looking down on all that natural fruity goodness!


Nut-free crust, fresh lemon juice, red raspberries and creamy lemon cheesecake filling!

One thing I like to do is keep it low fat.  I know, we're already eating low fat.  We love nuts, but I don't like to over do it, especially since the base for the creamy lemon filling is made with cashews.  So I used one of my basic nut-free crust recipes as a graham cracker type base and it was perfect!
  

Yummy dessert!

My official taste tester, who does not like traditional cheesecake or any type of cheesecake for that matter, gave two thumbs up and a BIG cheezy grin (pun intended) that he approves this recipe.  I asked if I needed to make any changes or if there was too much or too little of anything.  He said, and I quote: "too little." I said okay, too little of what?  He said: "too little of a slice!"  Yep, he was correct.  He got another slice. 


Raw Raspberry Lemon Cheesecake
8" springform pan

Crust:
1 cup flax meal
1/4 cup dried coconut shreds
1/4 cup hemp heart seeds
1/2 cup medjool dates (or dates of choice)

Put all ingredients into food processor and process until mixture can hold together by a few pinches with your fingers.  Do not over process - this crust resembles a graham cracker type crust.  Put crust into an 8" springform pan and press down evenly and firmly.  Put in fridge.

Lemon Filling:
2 cups cashews - soaked for at least 4 hours, rinse and drain
1/4 cup coconut milk (can substitute with almond milk)
1/3 cup plus 1 Tbs fresh lemon juice
1/3 cup coconut oil (liquefied)
1/3 cup agave
1 tsp vanilla
pinch sea salt

In vitamix/blender, blend until smooth and creamy.  Pour into crust filled springform pan and spread evenly around.  Put into freezer uncovered for at least 90 minutes or until the top is somewhat firm to touch.

Raspberry Puree:
2 cups frozen raspberries (or fresh)
1/3 cup agave
1 Tbs coconut oil (liquefied)

Blend all ingredients until well combined.  Pour into a measuring glass and set in fridge to chill. 

After lemon filling is set, slowly pour the raspberry puree on top and spread around evenly.  Put back in freezer for several hours - I left mine in over night.  Remove from freezer and springform about 60-75 minutes prior to serving.  Top with berries of choice or leave as is - perfect either way. 

Peace☮
Rocki


p.s.
If you want more of my recipes sooner than later, I post on IG (Instagram) daily.  While I do post regularly here on my new blog, sometimes life takes over and IG is quicker.  However, plans are to post more often here :)

Friday, March 7, 2014

Raw Apricot Bars - Vegan and Gluten-Free

Raw Vegan Apricot Bars

Whether fresh, dried, in smoothies, desserts, jams or savory meals, we love apricots!

One of Mark's favorite treats is my Raw Apricot Bars.  Like many of my other recipes, this has expanded from a few ingredients to several.  Coming up with different recipes depends on what I have on hand and my taste buds at that moment.  For the most part I like to keep it simple, but then there are times I want to be more creative and use a variety of ingredients. 

These apricot bars are chewy right off the bat with loads of flavor!  I can't go on without mentioning the nutritious side of this delicious bar.  Besides Vitamin C, apricots are a good source for Vitamin A as well as potassium and fiber, just to name a few.  I don't want to overlook all the other ingredients in this recipe, but I would be writing a short novel on each one if I did.  I'll just say that this is one healthy raw vegan treat.

Raw Apricot Bars - Vegan and Gluten-Free

1/2 cup cashews
1 cup dates
1 cup dried apricots
2 Tbs dried coconut shreds
1/4 cup hemp heart seeds
1/4 cup dried cranberries
1/4 cup pepitas
1/4 cup sunflower seeds

In food processor:
- add cashews and process until semi-small bits
- add in the dates and apricots and process until broken down somewhat
- add in the remaining ingredients and process until well combined and can hold its shape - form into a firm ball to check then pop it in your mouth.

In an over lined 8x6 dish (or size of choice) scoop mixture in - it may appear that the dish is too small, but hang on we're not done yet.  Pat down enough so you can take the over wrap of the lining and cover the mixture.  Use your hands, spatula, small cup or other item and press/roll firmly down on the mixture until entirely evenly flat and firm. 

Put dish into freezer for at least 60 minutes.  Cover the dish, but not sealed.  Remove from freezer, lift out with the lining and onto a cutting board.  Discard lining and cut into desired size bars. 

I keep them stored in the freezer and we take one out when we want a snack.  They don't freeze like an ice cube, so you can eat them as soon as you take one out or let it sit on the counter for a few minutes if you prefer a more softer bar.  You can store them in the fridge as well, but I believe they last longer in the freezer - hidden behind the bananas so Mark can't find them.

Peace☮,
Rocki