Friday, September 19, 2014

Cherry Chocolate Smoothie - Raw Vegan Treat

Smoothie - Cherry Chocolate

Sometimes less is more.  As is the case for my Cherry Chocolate Smoothie - and this post.

Only 3 ingredients, plus water, and you'll have a delicious smoothie treat.

Oh and just to mention... I don't like overly sweet foods and while I think this was sweet enough, feel free to add sweetener of choice if needed.


Cherry Chocolate Smoothie

2 ripe bananas: 1 frozen and 1 non-frozen
1 cup frozen cherries
1 TBS heaping cacao powder
water - start with 1/2 cup

Blend all ingredients in high powered blender until smooth and creamy.  You can adjust the consistency by adding more water to your liking.

Enjoy the simple things.

Peace☮
Rocki

Wednesday, September 17, 2014

Raw Taco Salad with Spicy Hemp "Cheese" Dressing - Vegan as always

Raw Vegan Taco Salad with Spicy Hemp "Cheese" Dressing

Who doesn't love taco salad - especially guilt-free eat all you want taco salad!  We eat taco salad frequently and I tend to change up some of ingredients each time, as well as the spicy "cheese" dressing. 

Above is one version that I have loaded with a rainbow of veggies on top of a bowl of greens: cherry tomatoes, red onion, green onion, red & yellow bell pepper, corn, avocado, cilantro and my Walnut Mushroom Filling that I tweaked just a tad bit (recipe below).  

Oh and Mark likes beans in his sometimes (beans do not like me), so I added pinto beans in his bowl.  On the side are my raw vegan taco chips that I have yet to write up the recipe for, but I'll do that in good time.

Raw Vegan Taco Salad with Spicy Hemp "Cheese" Dressing

This version is just about the same, but I added red cabbage and omitted the red & yellow bell peppers.  Both were served with my Spicy Hemp "Cheese" Dressing.

You can't go wrong with taco salad, or salad in general, so fill your bowls with lots of greens and add whatever veggies you love to your hearts content!


Walnut Mushroom Taco Filling II - raw & vegan
(for my nut-free version, go here)

1 heaping cup walnuts
2 1/2 cups quartered baby portobellos (8oz package)
1/2 tsp garlic powder
1/2 tsp onion powder
1/2 tsp ancho chili powder (I typically use more)
1 tsp smoked cumin powder
1 tsp oregano
1 Tbs Braggs liquid aminos (or Tamari)

Put all ingredients in order into food processor and pulse process until you have small bits that resemble taco meat.  Don't over process or you will end up with pate.  This will be light in color, but will darken after a little while. 

Store in fridge for a couple hours to let the ingredients mingle or serve immediately.  This is best when eaten fresh, but will last in the fridge for one extra day.

Note:  I change this recipe up almost every time I make it by adding other spices, increasing the heat, etc.  It's very versatile, so adjust to your taste buds.
 
Spicy Hemp "Cheese" Dressing
 
1 small red bell pepper - seeded
1 small banana pepper- seeded (or pepper of choice for heat)
1 large clove garlic
1/2 cup hemp heart seeds
1/4 cup nutritional yeast (needed for "cheese" flavor)
1/4 tsp ancho chili powder
juice from 1 lime
good pinch of sea salt
*1/4 cup water
 
Put all ingredients into blender and blend until smooth and creamy.  You might have to work the ingredients down with a tamper (if using vitamix) or stop and push/scrape down as needed.  *You may want to add a little more water to thin down if you like or to desired consistency.  This dressing will thicken up a little more while in the fridge.
 
You can adjust the heat by adding less of the pepper and chili powder and/or adjust to your tastes buds. 
 
Store in fridge in airtight container for up to 4-5 days, but is best eaten fresh and within 3 days.
 
Peace☮
Rocki

Monday, September 15, 2014

High Raw - Vegan Quinoa Collard Wraps with Special Sauce

High Raw Vegan Quinoa Wraps 

Occasionally I do eat cooked foods, but not very often.  When I do, I typically incorporate it with mainly raw foods.  One of the cooked foods I truly love is quinoa. 

In short, quinoa is a nutritious gluten-free seed that is a great source of complete protein and fiber.  Quinoa is used like a grain - you can use it in both savory and sweet recipes.  If you've never had it before, give it a try!

For this recipe I used cooked quinoa as the base along with a lightly steamed sweet potato (not yam) with raw veggies and my Raw Vegan Special Sauce.  My tummy isn't able to handle uncooked sweet potatoes, so I simply lightly steam them to satisfy my sensitive tummy. 

This is a very flavorful and filling meal - easily prepared with just a few basic ingredients.  I did not measure the ingredients I put into the quinoa mixture as I just went with what looked and tasted good to me.  Feel free to add or omit any of them.  However, I am including my Special Sauce recipe as that is what really makes this dish flavorful.


High Raw Vegan Quinoa Collard Wraps
approximately 8-10 wraps

Collard Leaves or other wrap of choice

cooked and cooled quinoa (1 cup dry cooked in 2 cups water as per package directions)
1 lightly steamed sweet potato - diced (not yam)
couple handfuls baby spinach - chopped
onion - thinly sliced (as much or little as you like)
avocado - sliced thin

Put all ingredients *except sliced avocado* into a large bowl and gently combine.  Set aside and make the Special Sauce.

Raw Vegan Special Sauce

1 yellow bell pepper
1/2 cup hemp heart seeds
1 banana pepper (or pepper of choice)
juice of 1 lime
small handful cilantro
1/4 tsp ancho chili powder (or to your liking)
pinch of sea salt

Blend all ingredients until smooth and creamy.  Pour sauce into the quinoa mixture bowl and gently combine.

Note about the collard leaves:  I use very large leaves that I cut along both sides of the stem, which gives me 2 leaves.  But you can do this however you like.

For each wrap: place the collard leaf on a cutting board, add a scoop of the quinoa mixture and a couple slices of avocado then roll up like a burrito.  Serve immediately and enjoy!

Peace☮
Rocki

Friday, September 12, 2014

Raw Vegan Veggie Burgers - Nut-Free Version

Raw Veggie Burgers - Vegan and Nut-Free

Super delicious and bursting with flavor raw vegan veggie burgers!  

This is one of my older recipes that I'm finally getting around to posting.  Just never thought of taking pics of these as they aren't the prettiest looking specimens, but they sure are delicious!  I make different versions of veggie burgers as I tweak them all the time.  These are nut-free, but then sometimes I feel like a nut so I'll use walnuts (tee hee hee). 

Raw Veggie Burgers in the dehydrator

While in the dehydrator, they smell soooo good that it's hard to not eat them right off the tray.  Not that I have ever done that (snicker snicker).  But it's well worth the wait. 

The recipe is super easy to make and you can adjust the seasonings and herbs to your liking.  That's one of the tweaks I make as I just let my taste buds take control - partly anyway.  So let's get to the recipe.

Raw Vegan Veggie Burgers - Nut-Free
*makes approximately 8 burgers

1 cup sunflower seeds ground to flour consistency
place in large bowl and set aside

2 large garlic cloves - minced
2 heaping cups mushrooms (quartered)
1/2 onion roughly chopped

Put the above into food processor and pulse process several times until broken down into small bits, but do not over process or it will turn into mush.  Transfer this mixture into the flour bowl and combine well.

Add the following into the flour bowl:

1 large carrot - shredded
1 large zucchini - shredded
1 1/2 TBS Braggs or Tamari
1 tsp heaping Marjoram
1 tsp basil
1/2 tsp oregano
1/2 tsp onion powder
2 TBS flax meal

Combine ingredients well.  Mixture will be thick and wet.

I make 8 large thick patties as they shrink down in size.  However, you can make them as big or small as you wish - just remember that will alter the time frame in the dehydrator.

Scoop mixture onto lined dehydrator sheet and form into a large thick pattie.  Do this for each one.  Put into the dehydrator at 145° F for 1 hour only, then turn down to 115° F.  When the top is dry to touch (about another hour or so), transfer them to mesh trays by placing a mesh sheet and tray on top of the patties, flip the trays over then slowly peel back the liner.  Put them back into the dehydrator, wet side up, until done.  They will be moist (not wet) on the inside, yet firm when done.

Total time can vary between 5-7 hours or longer due to a variety of factors (thickness and size of patties, weather, location, humidity, dehydrator, etc.).  Mine took about 6 hours total, but I live in the desert, so that is a factor.
I used romaine leaves for our "bun" and topped them with sliced tomato, onions and avocado.  These are flavorful enough so that you don't need any condiments, but if you prefer to use them then by all means go with your taste buds and enjoy!

Peace☮
Rocki

Thursday, September 11, 2014

Raw Lasagna - Marinated Portobello with Vegan Herb "Cheese"

Raw Vegan Lasagna

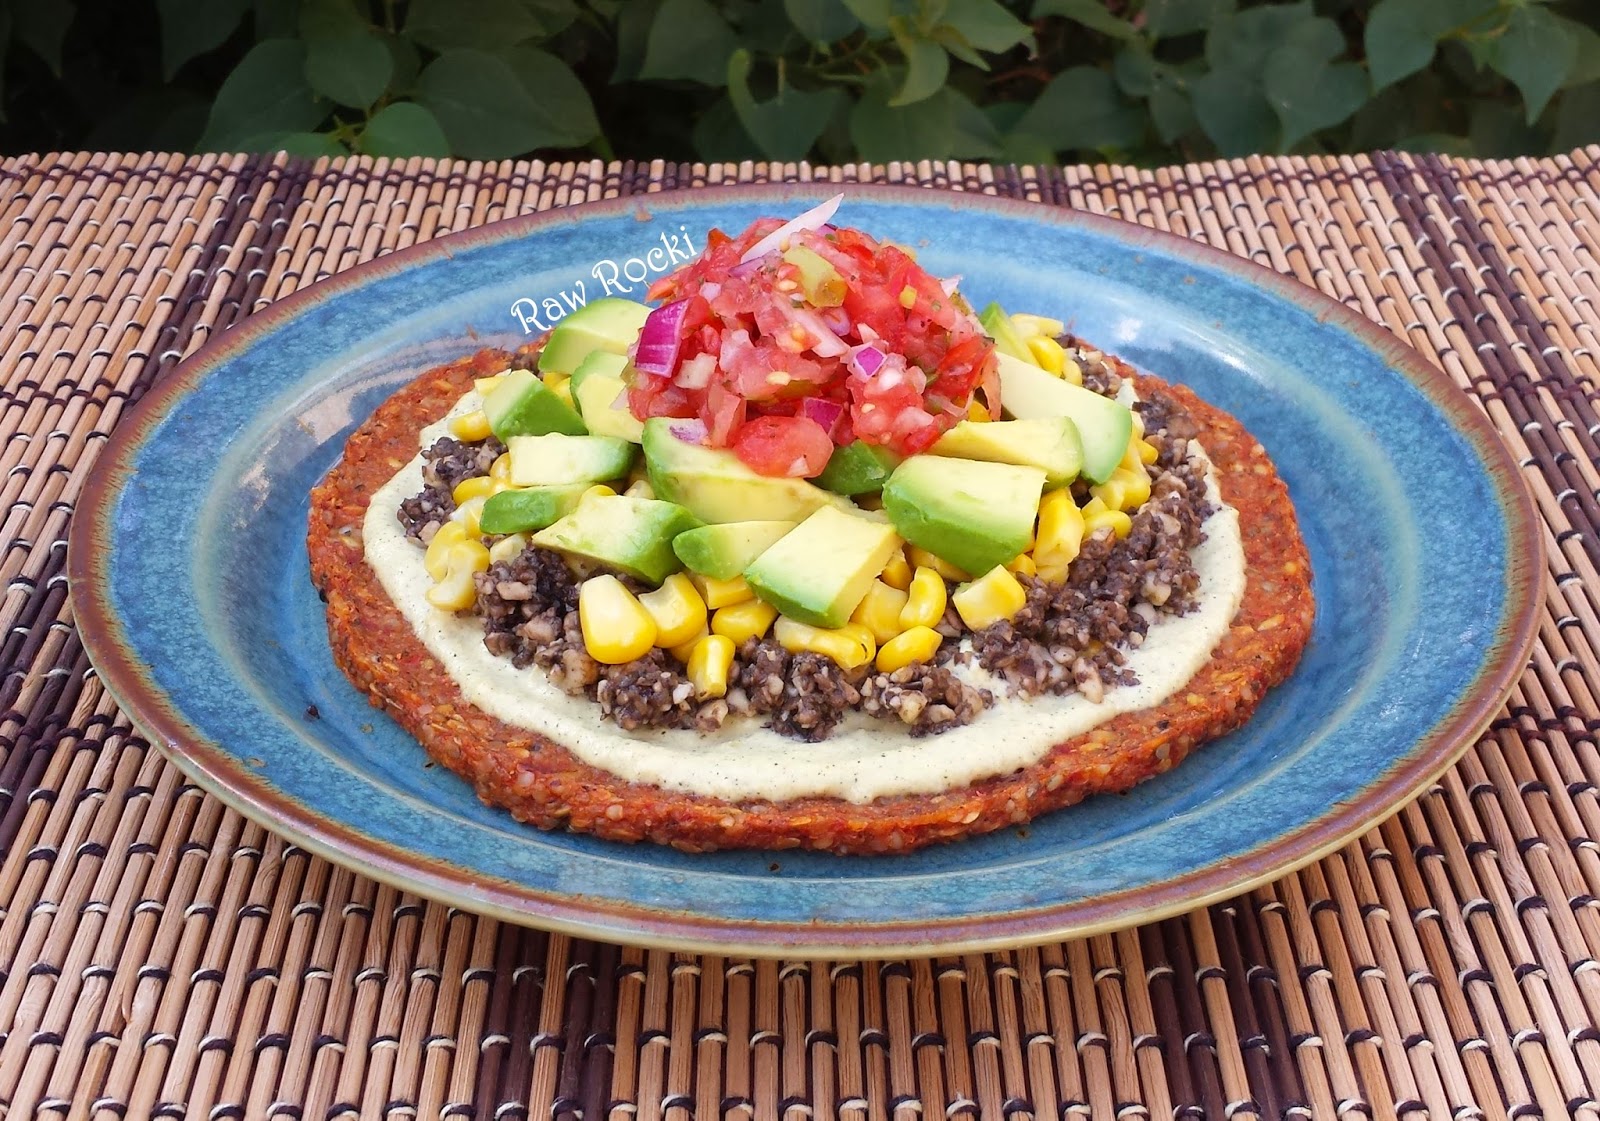
Raw Lasagna - YUM!  As you can probably tell I love making raw lasagna.  It's one of Mark's favorites, besides my raw tacos, burritos, etc.  It's so easy too.  Of course there is some food prep depending on what you have in the fridge and how you want to make it, but for the most part it is so easy it's crazy.


Marinated Portobello with Vegan Herb "Cheese" Raw Lasagna

This one I made a little heartier by using Portobello mushrooms which I marinated for extra flavor and to soften them up a bit.  I also dehydrated them, but no worries if you do not have a dehydrator as you don't have to do that step.  It just gives them a more "cooked" like texture and appearance.  

Raw Vegan Lasagna - Yum!

The "cheese" is a variation of many of my other hemp "cheese" recipes.  I don't always have fresh herbs on hand, which are always the best, so I use dried in those cases - use whatever you like though.  For the red sauce... well I change it up here and there all the time, but here's this version.  Feel free to change it up to your taste buds.  That's the beauty of raw foods!


Raw Lasagna - Marinated Portobello
with Vegan Herb "Cheese"
this made 2 huge platefuls

Marinated Portobello Mushrooms
2-3 Portobello's, degilled and sliced thick (I used 2 large)
1 Tbs apple cider vinegar (I use a raw gluten-free version)
1 Tbs Braggs or Tamari
1 Tbs EVO (extra virgin olive oil)
1/2 Tbs Agave
1/2 tsp onion powder
1/4 tsp paprika
1/2 tsp garlic powder

Combine the marinade ingredients in a small bowl.  Place the sliced portobellos into a Ziploc bag or other container and pour the marinade into the bag.  Try to coat each one as well as you can.  It may seem as if there is not enough marinade, but the shrooms will develop juice while marinating.  Marinate in fridge for at least 6-8 hours - the longer the better.  Every so often I gently turned the bag over a few times to coat.  When ready to layer, simply remove the shrooms from the bag and let rest to drain onto a paper towel lined plate or cutting board. Or...

*optional* After marinating, place on lined dehydrator tray and dehydrate at 115° F for approximately 1-2 hours, or longer if you wish.

Tomato Sauce
1/4 cup heaping sundried tomatoes - soaked until softened, then drain
2 medium tomatoes - roughly chopped
1/4 heaping cup onion - roughly chopped
1 medjool date
1 large clove garlic - minced
5-6 basil leaves - chopped
1 long sprig rosemary
1 tsp oregano
1 tsp onion powder
1/2 tsp paprika
black pepper - few turns or to taste
pinch sea salt

Process in food processor.  Mixture will be thick.  I don't like my lasagna wet and soppy, so I strain my sauce.  Put the tomato mixture into a fine to medium mesh strainer placed over a bowl and set aside to drain while you prepare the rest of the lasagna ingredients.

Hemp Herb "Cheese"
1 yellow bell pepper, seeded and roughly chopped
1 large garlic clove
1 cup hemp heart seeds
small handful fresh basil
1/2 tsp onion powder
1/2 tsp oregano
1/2 tsp thyme
juice from 1/2 lemon
1/4 tsp sea salt
water as needed

Blend all ingredients until smooth and creamy.  I like this "cheese" to be a little on the thick side as it works best for spreading on the zucchini layers.  If it is too thick, thin it out with water, a little at a time, until desired consistency.

Spinach Layer
Fresh baby spinach - roughly chopped or torn
amount will vary, use as much or as little as you want

Zucchini noodles
I used 3 zucchinis - sizes vary so use however many you need

I made the noodles with my mandolin - a bit thicker than usual due to the amount of veggies that I was using.  They soften up like noodles while in the fridge for a couple hours and are so yummy!  Anyway, you can also slice them with a knife if you don't have a mandolin.

Let the layering begin!  I used 2 zucchini noodles for each layer that I partially overlapped to make a hearty lasagna serving.  I put a good layer of the herb "cheese" on both sides of the zucchini noodle layers so that it would hold in the veggie layers all nice and snuggly - except when I layered with the red sauce.  You can see how I layered mine, but feel free to layer in any order you wish. 

This can be served immediately, or put in the fridge for 1-2 hours to let the flavors mingle and the zucchini noodles soften.  Enjoy!

Peace☮
Rocki

Monday, September 8, 2014

Chocolate Grape Smoothie

Chocolate Grape Smoothie

Simply put - this is one awesome tasting smoothie!  I took my Chocolate Jam Swirl Smoothie and simplified it into one easy step.  It will definitely satisfy your chocolate sweet tooth.


Chocolate Grape Smoothie

1 frozen banana
1 non-frozen banana
1 cup ripe red grapes (or grapes of choice)
1/2 cup frozen (or fresh) blueberries
1 heaping TBS cacao powder
water - about 1/2 cup (start with 1/4 cup and adjust to your liking)

Blend all ingredients in high powered blender until smooth and creamy.  You can adjust the consistency for a thinner smoothie by adding more water.  Enjoy to your hearts content!

Peace☮
Rocki

Saturday, September 6, 2014

Mexican Pizza - The Raw Vegan Way

Mexican Pizza - the Raw Vegan Way

We LOVE Mexican food (obviously) and could eat it 7 days a week.  Scratch that.  Make that Raw Vegan Mexican food.  Living here in the southwest we practically live on Mexican food.  In fact, Mark is getting much better with having a little heat in his food. 

Scratch that.  He now LOVES heat in his food.


Raw Mexican Pizza

I simply took one of my raw vegan pizza crusts out of the freezer (sometimes I make a few personal sized pizza crusts and store them in the freezer for up to a week, but they've never made it that long in there ;) and used the leftover walnut mushroom taco filling, mildly spicy hemp "cheese" and pico de gallo from the night before, along with some veggies and voila'!  Mexican pizza!

Eat the rainbow with my Raw Vegan Mexican Pizza!

You can find my pizza crust recipe here or for my soft corn tortillas go here - both raw and vegan of course.  My Walnut Mushroom Taco Filling is here  and my Pico de Gallo is here along with a nut-free taco filling.  Last but not least, is another version of my hemp cheese that I used for my Mexican pizza.

Hemp Cheese - Mildly Spicy version
 
1 yellow bell pepper
1 cup hemp heart seeds
1/4 cup nutritional yeast (needed for the "cheese" flavor)
1 large clove garlic
1/2 tsp onion powder
1/4 tsp ancho chili powder
juice from half a lemon
1/4 cup water (or more)
good pinch of sea salt
*optional: small pepper of choice for more heat (tastes yummy with or without)

Put all ingredients into blender and blend until smooth and creamy.  You might have to work the ingredients down with a tamper (if using vitamix) or stop and push/scrape down as needed.  This will be somewhat thick and creamy, but you can adjust it with more water to thin it down to your liking.

Peace☮
Rocki

Wednesday, August 20, 2014

Raw Vegan Nut-Free Taco Filling, Pico de Gallo and Green Baja Sauce

Pico de Gallo, Nut-Free Taco Filling, Green Baja Sauce - Raw and Vegan

For those who like or need to keep their meals nut-free, I altered my Walnut Mushroom Filling to accommodate you.  I like to keep most of our meals either nut-free or at least enjoy them sparingly.

This version I tweaked ever so slightly and replaced the walnuts with raw sunflower seeds.  It has a nice texture and same great flavor as my original recipe.  Perfect replacement for the walnuts.  I'm also working on another one, which I've made before but want to tweak it a bit more before posting it.

I also created another new sauce to go with our raw tacos tonight.  Mark loves my hemp cheeses, but I wanted something different and was thinking of a Baja sauce.  It came out fresh and bursting with flavor!

My pico de gallo is a staple here, we eat this regularly and it was funny to actually measure it.  I change this up frequently, so go with your taste buds.  Oh and yes, there was guacamole with our raw tacos.  Can't eat Mexican food without guacamole!  Any meal for that matter.

Nut-Free Taco Filling - Sunflower Seeds

1 heaping cup raw sunflower seeds
2 1/2 cups quartered baby portobellos (8oz package)
1/2 tsp garlic powder
1/2 tsp onion powder
1/2 tsp ancho chili powder (I typically use more)
1 tsp smoked cumin powder
2 tsp Braggs liquid aminos (or Tamari)
 
Put sunflower seeds into food processor and process until you have small bits.  Add in remaining ingredients and pulse process until it resembles taco meat.  Don't over process or you will end up with pate - unless you want pate.  This will be light in color, but will darken after a little while. 
 
Store in fridge for a couple hours to let the ingredients mingle or eat immediately.  This is best when eaten fresh, but will last in the fridge one extra day.
 
Note: Feel free to adjust the spices to your to your taste buds - I do that all the time.
 

Green Baja Sauce

1/2 yellow bell pepper
1 small pepper for heat of choice - or use more yellow bell
1/4 cup roughly chopped onion
1 clove garlic
1/3 cup roughly chopped cilantro
juice of 1 lime
1/2 cup hemp heart seeds
water as needed

Put all ingredients in blender and just a tiny bit of water to help get it going.  Blend until smooth and creamy.  Add a little more water at a time to thin it out as desired.

Store in fridge for up to 3 days.


Pico de Gallo

3 medium tomatoes roughly chopped (about 2 1/2 cups)
1/4 cup cilantro (small handful)
1/2 cup roughly chopped green onion
1/2 cup roughly chopped white or red onion (I use a mix of both)
2 cloves garlic - *minced (or see below for easy way to mince)
juice of 1 lime
jalepeno of desired amount or other pepper for heat
pinch or two of sea salt

Put all ingredients into food processor and pulse process until broken down into chunky little pieces.  Or, process until your desired consistency.  I like to put mine in mesh strainer and let most of the juice strain out so it doesn't make our tacos soppy wet.  Your choice.

*TIP: to mince garlic the easy way, turn food processor on and with it running toss in the garlic cloves and voila'! minced garlic!  Scrape down the sides and then add in the rest of the ingredients.

Hope you enjoy the recipes and have fun creating!

Peace☮
Rocki

Tuesday, August 19, 2014

Taco Night! Raw Vegan Walnut Mushroom Filling and more

Raw Vegan Tacos and Dip
 
I'm going to get right to the recipes as I'm a bit short on time, so I'll just let you look at the yummy pictures.
 
Raw Vegan Tacos with Baby Romaine
 
However, I will say that it's taken me a while to post more of my raw vegan Mexican food because, just like when I used to cook, I never measured - especially when it came to Mexican food.  Anyway, I finally did. 
 
Raw Vegan Tacos with my Soft Spicy Corn Tortillas
 
Walnut Mushroom Taco Filling - raw & vegan
(for my nut-free version, go here)
 
1 heaping cup walnuts
2 1/2 cups quartered baby portobellos (8oz package)
1/2 tsp garlic powder
1/2 tsp onion powder
1/2 tsp ancho chili powder (I typically use more)
1 tsp smoked cumin powder
1/2 Tbs Braggs liquid aminos (or Tamari)
 
Put all ingredients in order into food processor and pulse process until you have small bits that resemble taco meat.  Don't over process or you will end up with pate.  This will be light in color, but will darken after a little while. 
 
Store in fridge for a couple hours to let the ingredients mingle or eat immediately.  This is best when eaten fresh, but will last in the fridge for one extra day.
 
Note:  I change this recipe up almost every time I make it by adding other spices, increasing the heat, etc.  It's very versatile, so adjust to your taste buds.
 
For the rest of the recipes you can find them here:
 
My pico de gallo will be in the next post.
 
Peace☮
Rocki

Thursday, August 14, 2014

Raw Vegan Pizza Balls - version II

Raw Vegan Pizza Balls

Bite size pizza - raw, vegan, gluten-free and nut-free.  This is a super tasty tweaked version of my Raw Vegan Pizza Rounds and Poppers.  There's just a slight difference between the two recipes, but enough to notice so thought I would post this recipe as well.

I popped these yummy snack size bites into the dehydrator for just a couple hours and boy, I don't know how I stopped myself from eating them one by one!  They are SO good right out of the dehydrator, but no worries if you do not have one as these tasty pizza balls can be eaten without dehydrating.  Yep.  Sure can.

Bite Size Pizza - the Raw Vegan Way

When you bite into these delicious balls of bliss, especially right out of the dehydrator, you'll think you're eating a slice of pizza.  Pretty close to it at least.  Plus they are chewy and... oh my... I think I need to make another batch.

Raw Vegan Pizza Balls Makes approximately 18-20 small bites

1 cup raw sunflower seeds
1/2 heaping cup sundried tomatoes (soaked in 1 cup of water - reserve water)
1/3 cup onion, roughly chopped
1/4 cup hemp heart seeds
1/2 heaping cup nutritional yeast (needed for "cheese" flavor)
1 tsp fennel seeds (needed for tasty pizza flavor)
1/2 tsp Italian seasoning
1/2 tsp oregano
1 tsp garlic powder
1/8 tsp sea salt
*optional black olives (about 5-6 quartered)

In a food processor add sunflower seeds and process until small bits that resembles flour.  Do not drain the soaked sundried tomatoes - simply scoop them out of the soak water, give a gentle squeeze and add them to the processor.  Add in all remaining ingredients *except* water and process until mixture holds together when forming a ball.  You may need to stop and scrap down the sides, etc. as mixture will be somewhat thick.  It shouldn't, *but* if the mixture seems too dry add in some of the soak water a little at a time until achieved.  Take a little taste test too - you know you want to.

Roll the mixture into small bite size balls.  You'll probably want to do another taste test at this time.  If there are any left and you don't want to dehydrate them, serve immediately or put them in the fridge to chill.

Or - put them on a lined dehydrator tray and dehydrate at 110°F for approximately 2 hours or longer if you wish.  This will not turn them into crust or crackers, it will simply firm them up a bit more.  You will definitely want to do another taste test right out of the dehydrator - mmmmm!  In fact, at this point you may want to make a double batch.

Peace☮
Rocki

Tuesday, August 12, 2014

Raw Pizza Crust - Vegan, Gluten-Free and Nut-Free

Raw Vegan Pizza

Every time I make my pizza I like to change the toppings, and sometimes tweak the crust.  I have a couple of my raw vegan nut-free crust recipes posted here on my blog, but even though I only tweaked this one a bit, it was actually enough to make a much larger pizza or a couple medium ones. 

The toppings on the pizza above are: peeled carrots, sliced white onion, shredded red cabbage, sliced sweet yellow peppers, my own sundried cherry tomatoes and sliced avocados.  My Spinach Basil Pesto recipe can be found here.

Mark's Birthday Pizza and Bliss Ball "Cake"

Mark's birthday was July 1st.  I asked him what he would like for his birthday dinner and he said "PIZZA!"  You got it hon!  So I made him his special birthday pizza topped with marinated mushrooms, sundried tomatoes and avocado.  He ate every last crumb. 

Yes.  I sang the birthday song.  Twice. 

So here's my raw vegan, nut-free crust that I tweaked.  This will make 2 medium size pizza's or 1 large plus 1 personal pizza... or...

Raw Rocki's Pizza Crust
vegan and nut-free

1/2 cup plus 3 TBS flax meal
1/2 cup flax seeds
1/2 cup heaping hemp seeds
1/2 cup sunflower seeds (ground into flour)
1/4 heaping cup nutritional yeast
1 1/2 TBS psyllium husk
1 TBS Italian seasoning
1/4 tsp sea salt

Combine all the above ingredients in a large bowl and set aside.

1/3 heaping cup sundried tomatoes - soaked in 2 cups warm water for about 30 minutes (drain and reserve liquid as you'll need it in the next step)
2 medium tomatoes
3/4 large red bell pepper
1/4 cup heaping roughly chopped onion
1 tsp garlic powder or clove
1 tsp fennel seeds
pinch sea salt

Put ingredients into a food processor and process well.  The mixture will be somewhat thick and not watery.

Add 1 1/2 cups of the soak water to the dry mixture bowl and combine well.  Now add the above tomato mixture to the bowl and stir until combined.  If mixture seems too thick, add more water a little at a time.  It won't be like typical pizza dough, but will be quite thick.

Line two dehydrator trays with a teflex sheet (or similar) and spoon the mixture onto them.  Your choice of the sizes you want to make, but just make sure to not make them thin as it shrinks up while dehydrating.  Shape into pizza size and shape of choice.

Put into the dehydrator at 145° F for 1 hour only then turn down to 115° F.  When the top is dry to touch (about another hour), transfer them to mesh trays - remove them from the teflex sheet by slowly peeling it off.  Put them back into the dehydrator, wet side up, until done. 

Total time can vary between 5-7 hours or longer due to a variety of factors (thickness and size of crust, weather, location, humidity, dehydrator, etc.).  Mine took about 6 hours this time, but I live in the desert, so that is a factor.
Enjoy!

Peace☮
Rocki

Sunday, August 10, 2014

Dragon Fruit Delight Smoothie Parfait

Dragon Fruit Smoothie Parfait

Every time I turned around, Dragon Fruit was everywhere on Instagram.  Except in my hands.  I was so wanting to try this fruit that I looked everywhere for months on end, but no luck.  Then I won a tropical fruit box that was filled to the brim with delicious fruit which I had never tried before or even seen in person.

And there it was... wrapped up so sweetly.  A single Dragon Fruit.

Buddha with Dragon Fruit

I actually jumped up and down with excitement.  Okay, actually I screamed like a little girl.  Out loud.  I'm sure my neighbors all heard me.

Anyway, I waited until the very last minute of ripeness to try this fruit.  Mark and I each took a taste and, to be perfectly honest, it was just okay.  It wasn't horrible mind you and had an okay taste factor, but perhaps I put too much into my pursuit of this interesting fruit and expected fireworks.  So I made us a couple smoothie parfaits with it and they were quite delicious. 

In any case, I finally got to try Dragon Fruit, and for that I am thankful.

Dragon Fruit Delight

Bottom layer:
1 1/2 cups strawberries
2 frozen ripe bananas
1 cup coconut water (adjust as needed)

Blend in high powered blender, pour into 2 glasses and set in freezer while making the next layer.

Top layer:
1 Dragon Fruit
1 frozen ripe banana

Blend well.  Remove glasses from freezer.  Gently pour or scoop onto the bottom layer of both glasses.  I garnished ours with chopped strawberries, coconut shreds and dragon fruit.

Enjoy!
Rocki

Thursday, August 7, 2014

Goji Berries - Superfood

Goji Berries

I absolutely love goji berries!  This little powerhouse of a berry not only adds a nutritional punch to your diet, but can be used in a variety of recipes, or eaten as is.

Dried goji berries are chewy with a taste all on their own.  They are not overly sweet and have actually been described as a cross between a cherry, raisin and cranberry.  These tiny berries are a powerful nutrient rich food and have been used in Traditional Chinese Medicine for over 2000 years.  Filled with antioxidants, carotenoids, 18 amino acids, fiber, vitamins A, C and E, and over 20 other trace minerals and vitamins including zinc and iron... well, you can see why they are one of the top superfoods.

I add goji berries to a variety of my raw vegan recipes for added nutrition, flavor and bulk, such as: smoothies (makes an excellent chocolate smoothie combined with raw cacao powder, another nutritious superfood), nice cream (vegan ice cream), brownies, bliss balls, protein bars, overnight oats, chia pudding, and so much more.

There's much more to know about Goji Berries, so Google them for more information.

Be healthy.

Peace☮
Rocki

Monday, August 4, 2014

Herb Smoked Lasagna - Raw Vegan

Raw Vegan Herb Smoked Lasagna

I love creating raw lasagna.  And eating it.  You really can't go wrong as there are a ton of ways to make raw lasagna.  I think that's part of the fun actually.  And eating it.

In this version I created a nut-free herb cashew "cheese" along with smoky tomatoes and onions in place of a sauce.  On each side of the zucchini noodles I put plenty of the "cheese" to hold all the fresh veggies in, and of course for the yumminess factor.  You can use any veggies you like, but here's the layers for this version from bottom up: shredded red cabbage, sliced avocado, double stacked mushrooms with "cheese" in between, and the tomato onion mixture.

Now that you're hungry, here's the recipe that made two huge stacks.

Herb Smoked Lasagna - Raw Vegan

2 large zucchinis - sliced thin or as desired
plenty of veggies of your choice

Cashew Herb Hemp "Cheese"
1/2 cup raw cashews - soaked at least 4 hours.  Rinse well and drain.
2 cloves garlic
1 1/2 Tbs nutritional yeast,
1/4 cup hemp heart seeds,
1 Tbs apple cider vinegar (or lemon juice)
1/2 tsp Mediterranean Marjoram
1 tsp Mediterranean Basil,
Pinch of sea salt
1/4 cup + 2 Tbs water

Blend all ingredients.  You may need to stop the blender and scrape down sides a few times.  Mixture will be somewhat thick, but if too thick add more water to your liking.

Smoky Tomato & Onions
2 cups cherub/cherry tomatoes
1/3 cup heaping onions, roughly chopped
1/2 tsp smoked paprika
1/2 tsp garlic powder

Put all ingredients in food processor and pulse several times until it resembles chunky salsa.  Put in strainer over a bowl and let drain - otherwise the lasagna will be soppy wet. After draining, put mixture in a small bowl and sprinkle a few times with more smoked paprika.

I used 2 slices of zucchini noodles for each layer, slightly overlapping them.  Spread some "cheese" on each side of the zucchini noodles then layer with veggies as you wish and enjoy!

Peace☮
Rocki

Saturday, August 2, 2014

Black Cherry Chocolate Smoothie

Vegan Smoothie - Black Cherry Chocolate

It's been quite hot out lately and that makes me more thirsty.  Well, "hot" is actually an understatement.  Last week we were over 110 degrees, as in 115 melt my brain degrees on Thursday.  Below is a screen shot of my phone in case you don't believe me.   However, the "Feels like 110°" part... I beg to differ.  Bear with me, I feel a wee rant coming on - blame it on the heat ;)

July 24, 2014... 115 degrees - hot is an understatement

Yes, I live in Arizona so I should accept the summer weather of 110° - pushing 120° (Yes, I lived here when we hit 122 OMG!° in 1990 and survived).  First off, let me say that I only live in Arizona and have nothing to do with the ignorant government and their policy's here in the great state of the sun.  I say this because lately AZ is in the news every time I turn around, and sadly not in a good way - it's embarrassing to say the least.  With that said, I do love the weather here.  I love the sunshine, wearing flip flops, shorts and tank dresses practically year round, the gorgeous sunsets, the beauty of the desert... but I do not like the brain melting, burn your hands on the steering wheel and your bum on the car seat type of heat.  Or the politics.

Rant over.

Not only in this type of heat, you need to drink plenty of fluids.  I love and drink plain fresh water from the time I get up until I go to bed.  Other than that, the only other drinks I have are my daily morning green smoothies, 1 cup of jo in the morning and my afternoon smoothie of choice.  Like my Black Cherry Chocolate Smoothie.  It is oh so delicious!

Black Cherry Chocolate Smoothie

1 frozen banana
1 non-frozen banana
1/2 cup blackberries
1/2 cup tart black cherries (or cherries of choice)
1 heaping TBS cacao powder
1 medjool date (or more if you like sweet - I don't like too sweet)
1/2 cup or more of cold water (adjust as needed)

Blend in high powered blender until smooth and creamy.  You can adjust the consistency for a thinner smoothie by adding more water.

Stay cool and enjoy!

Peace☮
Rocki

Wednesday, July 30, 2014

Sweet Potato Fudge Cookies - Semi-Raw and Vegan

Sweet Potato Fudge Cookies

I'm quite pleased with how this experiment turned out!  Delicious, chewy, fudgy, healthy and guilt-free cookies that are vegan, gluten-free and semi-raw. 

I like to keep most of what I eat nut-free, but of course I do enjoy the occasional nut loaded food.  Instead of using any type of nut or seed, I decided to try a sweet potato to create a yummy raw cookie.  Well, short version... raw sweet potatoes do not agree with my digestion, plus there are some things that are simply not meant to be eaten raw, in my humble opinion. 

Anyway, to satisfy my curiosity and tummy, I steamed the sweet potato.  Voila'!  That worked out much better.  Even though the sweet potato is lightly steamed, with everything else involved I consider this recipe to be semi-raw.

These cookies are dehydrated, but no worries as there's other options in case you don't have one or feel like waiting a few hours until they are done.

Before I get to the recipe for these super yummy cookies, I just want to make note that the dough is very thick when processing.  So if you do not have a good heavy duty food processor, you'll probably want to split it in half and finish processing it that way.  I'll explain in the recipe when to split the batch.


Sweet Potato Fudge Cookies
Semi-Raw and Vegan

2 cups roughly chopped steamed sweet potato (not yams)
1 1/2 cups semi-packed medjool dates (if dates are hard, soften them up a bit in water)

Put the above ingredients in food processor and process just enough to break down a bit.  Leave the mixture in the processor and add in the following:

1/4 cup cacao powder
1/4 oat flour (I make my own from gluten-free oats)
1 Tbs agave (or more to desired sweetness)
1/2 tsp vanilla
pinch of sea salt
fresh water

Start processing until everything is well combined.  If mixture seems too dry, start adding water 1 TBS at time.  At this point, if your processor cannot handle the dough mixture, remove about half of it to a bowl and continue processing until well combined and then do the same for the mixture in the bowl.

Form into cookies and place on mesh tray.  Dehydrate at 115° F for approximately 7-10 hours.  Time frame will vary due to location, weather, humidity, dehydrator, wetness, thickness, etc.

No dehydrator?  No problem.  Simply roll the cookie dough into bite size balls and if so desired, roll the balls into shredded coconut, hemp seeds, etc. then pop them in the freezer.

Or... if you're not raw, pop them in the oven at a low temp for about 30 minutes or until desired doneness. 

Store in freezer or fridge. 

Peace☮
Rocki

Monday, July 28, 2014

Raw Vegan Veggie Herb Flatbread

Veggie Herb Flatbread - Raw, Vegan & Gluten-Free

Please excuse the photo quality.  I typically take my photos outside, but lately it is way too hot for me to do that.  If I did, the food would look like a pile of goo and I don't think that would look too appetizing. ;)

This is a version of my other flatbreads.  I made my Raw Vegan Sloppy Joe's over the weekend and wanted something a little different than the others, so I created this one.  It's very flavorful and went quite well with the Joe's!  Let's just get right to the recipe...  

Raw Vegan Veggie Herb Flatbread

1 1/2 cups flax meal
1/2 cup hemp heart seeds
1/4 cup heaping nutritional yeast
1 Tbs phyllium husk
1/2 tsp garlic powder
1/4 tsp sea salt

Combine above ingredients in large bowl and set aside.

1/3 cup heaping sundried tomatoes - soaked in 1 1/2 cups water until softened.  Reserve soak liquid and set aside.

1 very large tomato
drained sundried tomatoes
1/2 cup onion roughly chopped
1 large garlic clove roughly minced
1 small peeled zucchini
1 small carrot roughly chopped
1 Tbs Herbs de Provence
1 tsp Mediterranean Basil
1 tsp Mediterranean Marjoram
1 tsp onion powder
pinch of sea salt

In food processor, process until well combined and somewhat resembles thick pasta sauce. 

Add 1 cup of the reserved soak water to the dry mix bowl and combine.  This will be thick.  Stir in the veggie mixture and combine well. 

This made 1 full tray plus a small square.  Spoon the mixture onto two lined dehydrator trays - pending on how big you want to make the squares.  Evenly spread the mixture, but don't spread it too thin as it will shrink up a bit in the dehydrator.

Put into the dehydrator at 145° F for 1 hour only then turn down to 115° F.  About another 30-45 minutes after that, or when the top is dry to touch, transfer the flatbread to a mesh tray.  Put a mesh sheet on top of the bread along with a tray, flip it over and remove it from the lined sheet by slowly peeling it off.  Put it back in the dehydrator until done.  I typically rotate the tray around on the hour or so, but is not necessary.  Total time will vary due to location, weather, humidity, dehydrator, wetness, thickness, etc.  I live in the dry desert, so this only took approximately 6 hours. 

Cut into desired sizes and once completely cooled, put into a ziplock bag or other container.  This will also soften the bread.  Can be stored on counter for a couple days or put in fridge.

Enjoy!

Peace☮
Rocki

Wednesday, July 2, 2014

Raw Lemon Lime Coconut Cheesecake - Vegan and Gluten-Free

Raw Vegan Lemon Lime Coconut Cheesecake

I won't get long winded on this post... don't hold me to that though.

First off, the photos truly do not give a great representation of how good this was, but since I won't be making another one for a while I figured I might as well post them.  The Arizona sun is just really harsh right now unless you get out there at a certain time without it melting everything.  And indoors, well I just can't seem to get a decent pic.  Anyway, lets move on.

Mark loves lemons and limes, but not cheesecake... at least not traditional cheesecake.  He surely doesn't seem to have a problem eating every last crumb of any of my raw vegan cheesecakes ;)  So I decided to make a double layer of his favorites - one of lemon and the other, you guessed it, lime.  Even though we rarely eat these types of desserts at home, I still like to create them for a splurge and then we share the rest with others.

Speaking of... I sent some with Mark to his work and it was a bigger hit than I expected.  That really made my day!  I sliced up the rest of it and he took it to work this morning. 

Raw Vegan Cheesecake - Lemon Lime Coconut

I really hesitated on posting the above pic, but just imagine taking a bite... taste the freshness of the lemon lime creamy filling and then the coconut nut-free crust... mmmmm.  So good! 


Raw Lemon Lime Coconut Cheesecake
Vegan and Gluten-Free

Crust:
1 1/2 cups dried unsweetened coconut (I used shreds)
1/2 cup flax meal
1 cup medjool dates
pinch of sea salt

In food processor, process a few minutes until well combined.  Mixture will be semi-crumbly.  Put into an 8" springform pan and press down firmly.  Place uncovered in fridge while making the fillings.

Lime Filling:
2 1/4 cups ripe avocados (I used 2 huge jumbo avocados)
Coconut meat from 1 Young Thai Coconut (approximately 1 cup)
Juice from 3 limes
Zest from 2 limes
1/3 cup agave
2 Tbs coconut oil (liquid)
Coconut water as needed

Put all ingredients *except the coconut water* into high speed blender and blend until smooth and creamy.  You'll probably need to use a tamper and work it down or stop the blender and scrape the sides, etc.  The mixture will be thick, but if it seems too thick to blend, add in a small amount of coconut water a little at time. You don't want to thin out the mixture, just enough water to help it blend.

Pour the mixture into the springform pan and place uncovered in the freezer for at least 60-90 minutes.

Lemon Filling:
1 1/2 cups cashews (soaked 6 or more hours, rinse & drain)
Juice and zest from 1 1/2 lemons
3 1/2 Tbs coconut oil (liquid)
*1/2 cup almond milk (or milk of choice)
1/3 cup agave
pinch of sea salt

Add in all ingredients, but start with *1/4 cup of the milk.  Blend until smooth and creamy.  As with the lime mixture, you'll need to tamper down the ingredients.  If needed, add the remaining almond milk.  Mixture will be thick but creamy.

Slowly spoon the mixture on top of the semi-frozen lime mixture and carefully spread it around.  I saved a little of the lime mixture and sort of mixed it in with a little of the lemon mixture on top, but is not necessary. 

Place uncovered in the freezer at least several hours or overnight.  To serve, remove from freezer at least 60 minutes to slice, then let it sit at room temp or in fridge until defrosted.  Time frame varies due to multiple factors.

Enjoy!

Peace☮
Rocki

Monday, June 30, 2014

Raw Vegan Whipped Tators - Mashed Cauliflower

Raw Vegan Mashed "Tators" - cauliflower that is

Just because we eat a raw vegan "it's a lifestyle not a diet", doesn't mean we can't have mashed "tators".

When I first heard about cauliflower mashed tators I was intrigued.  Then I started playing around with recipe ideas - until I created this one.  Whenever we're in the mood for some good ol' whipped/mashed "tators", this is my go-to recipe.  It's smooth, fluffy and oh so yummy!

You can use fresh or frozen (defrosted of course), but I prefer the frozen cauliflower for this recipe.  I know... I hear the gasps, but for some reason frozen cauliflower is easier on my tummy than fresh.  Anyway... if you use fresh, you'll need to adjust the liquid.  This recipe is for frozen.


Raw Vegan Whipped "Tators" - Mashed Cauliflower

1 16oz bag frozen cauliflower - defrosted
1/8 cup almond milk (or milk of choice)
1/2 cup cashews - soaked for at least 4 hours then rinse & drain
1/2 tsp garlic powder
1/8 tsp sea salt - or to taste
1/8 tsp white pepper - or to taste
1 Tbs of EVO (extra virgin olive oil)

Put all ingredients into high speed blender and blend until smooth & creamy.  If it is too thick, thin it out by adding more almond milk a little at a time until desired consistency.  Top with black pepper, take a bite, smile and enjoy!

Peace☮
Rocki

Friday, June 27, 2014

Raw Vegan Pizza with Spinach Basil Pesto

Raw Vegan Pizza with Spinach Basil Pesto

Oh.  My.  Gosh!  This was one of my best pizza's yet!  Honestly, Mark and I could hardly wait to dig in.  And let me tell you... crumbs did not fall.

Yummy Healthy Guilt-Free Pizza!

For this huge pizza I wanted a bright green sauce, so I created a raw vegan Spinach Basil Pesto.  For toppings, lots of colorful veggies: red cabbage, sweet onion, yellow squash, orange & yellow sweet peppers, avocado and my own sundried grape tomatoes.  I believe I made a rainbow! 

It was just too pretty to eat.  Riiiiight.


Raw Vegan Pizza Crust - ready to go into the dehydrator

I used my basic nut-free raw vegan pizza crust recipe that you can find here, but made it a bit bigger this time.  Oh and I also added a bit of white onion to the tomato mixture.  While the crust is in the dehydrator, I drool for hours as the house smells like a giant pizza! 

Rainbow Veggie Pizza

Just in case you wanted one last look at this colorful, delicious and healthy pizza before I get to the recipe.  I know, I'm such a tease (snicker snicker).

Raw Vegan Spinach Basil Pesto

1 cup packed torn basil
3 good handfuls baby spinach
1 Tbs nutritional yeast
1/3 cup pine nuts
2 Tbs hemp heart seeds
2 garlic cloves
2 Tbs lemon juice
4-5 turns black pepper
pinch or two of sea salt
*optional EVO

Put all ingredients into a blender except optional EVO (extra virgin olive oil) and blend until smooth and creamy.  You'll probably need to stop the blender off and on to work the mixture down.  It will be thick which is perfect for the pizza crust.  However, if it's too thick or you want a thinner consistency, add a little water or drizzle of EVO until desired liking.

My Raw Vegan Pizza Crust recipe is here.  Add your favorite toppings and enjoy!

Peace☮
Rocki

Tuesday, June 24, 2014

Chocolate Jam Swirl Smoothie

Chocolate Jam Swirl Smoothie

Just a quickie post for today.  Then again, this one doesn't need much of an intro. 

I'll sum it up.  Chocolaty.  Fruity.  Healthy.  Delicious.  Smoothie.  Easy recipe.

Chocolate Jam Swirl Smoothie

Jam Layer:
1 cup frozen blueberries (or fresh)
1 cup grapes
1 very small banana

Blend well and put in freezer while making next layer

Chocolate layer:
1 frozen banana
1 non-frozen banana
1 Tbs heaping cacao powder
enough water to blend with

Blend well.  Remove jam layer from freezer.  Alternately layer in glass and give a little swirl between layers.  Enjoy this lip smacking healthy smoothie treat.  It's one of my favorites that I keep making again and again and...

Peace☮
Rocki

Sunday, June 22, 2014

Raw Vegan Brownie Bars

Raw Vegan Brownie Bars

Here is another version of my raw vegan brownies.  You can never have too many brownie recipes.

This one I actually threw together because I was in need of a quick chocolate brownie fix.  We don't actually eat too many sweets.  Most of the desserts I make either go to Mark's work, family, or in the freezer for when we do want a treat.

Anyway, this recipe turned out very good.  Wish I would have taken more photos, but this is the only one as it was just going to be an Instagram post... didn't think I would blog about it, but it's too yummy and simple to not share.

Raw Vegan Brownie Bars

1 cup heaping pecans
1/2 cup unsweetened dried coconut
1/3 cup hemp heart seeds
1/3 cup cacao powder
1 Tbs coconut oil (liquid)
1 cup packed medjool dates
pinch of sea salt

Place all ingredients in food processor and process until mixture is well combined - do not over process.  Test to make sure you can form a ball with it in your hands and then pop it into your mouth.  You need to make sure it tastes good, right?  

Press mixture firmly in a lined 7x5 glass dish.  I over wrap my dish then fold it back over while pressing down on it with a large spatula.  Place dish uncovered in freezer for at least 60 minutes.  Remove from dish and cut into desired size bars or bites and enjoy!

Store in fridge or freezer - if there's any left that is.

Peace☮
Rocki

Friday, June 20, 2014

Tomato Stack

Tomato Stack Lunch

Want a quick, simple and satisfying lunch or snack?  Try my super easy Tomato Stack.  You should have seen the whole tomato as it was as big as my hand!  In fact, I could have stacked it higher, but this was perfect.

This is so simple that it doesn't actually require a recipe, so I'm just going to write up the basics and you take it from there.  Okie dokie? 

Tomato Stack

1 large tomato - sliced thick
1 small avocado - mashed and seasoned to taste
sliced sweet onion
sprouts

Layer ingredients and enjoy.

Peace☮
Rocki

Wednesday, June 18, 2014

Green Chocolate Smoothie - Raw and Vegan

Green Chocolate Smoothie

Green smoothies pretty much rock my mornings.  Chocolate (cacao) smoothies rock my afternoons.  Put them together and oh my gosh!  Pure bliss. 

Chocolate, meet green.  That's exactly what I did with this smoothie and let me tell you... it was SO yummy that I practically licked the mug clean!  Okay okay, so I really licked it clean ;) 

Green Chocolate Smoothie

Green Layer:
1 cup zucchini, roughly chopped
1 handful baby spinach
2 dates
1 large frozen banana
1 Tbs flax meal
1 1/2 Tbs cacao powder
1/4 cup water (adjust as needed)

Blend in powerful blender.  Transfer to separate container and put in freezer while making next later.

Creamy Layer:
1 large frozen banana
1 heaping Tbs almond butter
1/4 cup water (adjust as needed)

Blend well.  Layer in tall glass as you wish and enjoy.  I topped mine with cacao nibs for a bit of crunch, but it's seriously yummielicous as is.

Peace☮
Rocki